Review Summary
Marshall Tools Ltd.
Bkit
Bricky (wall-building tool)
Suggested Retail $120
Reviewed by Leon A. Frechette
06/24/06
How to use Bricky
As with any project, a good working plan is important but doesn't always guarantee the professional finished look that you hope to achieve. Sometimes projects evolve with time.
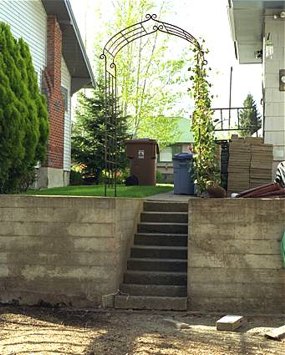
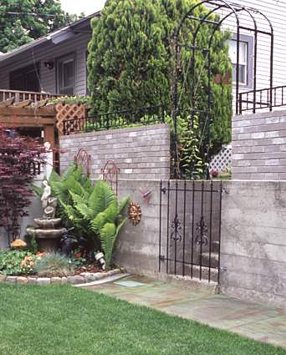
In our case, that "wow" look just didn't happen. We tried a variety of changes over the years, but were unable to achieve that masterpiece look until Bricky came along. My wife came up with the idea of installing decorative bricks on top of existing concrete retaining walls. This gave us an opportunity to use and test Bricky. Check out the results below. By next year the hops will grow up and over the arbor to help complete the project.
|
|
|
Beginning project in 2000 |
The project in 2006 |
Before using the Bricky tool, I had to prepare the concrete retaining wall so it would accept the new brick wall and ensure that the new wall would be safe to lean against. Your project my not require these steps, but keep them in mind for any future projects.
|
|
|
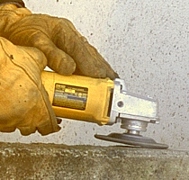
Grinding |
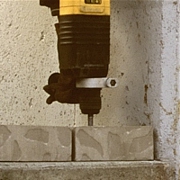
Drilling |
Installing Rebar |
- If the base surface is uneven, grind down any high spots to help achieve a uniform mortar appearance.
- Lay out the first course of bricks to determine where to drill 4" deep holes in the concrete to accept 1/2" rebar. Use a hammer drill and make sure the hole is not too tight.
- Use a short-handled sledgehammer to work the rebar into the hole. Then remove the rebar and reinstall it after laying the mortar and first course of bricks. Stagger rebar in the brick courses above this first level to strengthen the wall.
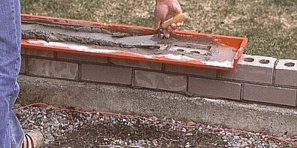 To lay the first course, apply a thick bed of mortar using the horizontal guide and trowel. Depending on surface unevenness, consider placing only the first two courses and let the project set up overnight before continuing. Place the horizontal guide on the course and slide it along the wall, scraping mortar into the channel as you proceed. Do not get ahead of yourself or the mortar will set up too quickly. Pace yourself and give yourself enough time to comfortably install the bricks into the bed of mortar. To lay the first course, apply a thick bed of mortar using the horizontal guide and trowel. Depending on surface unevenness, consider placing only the first two courses and let the project set up overnight before continuing. Place the horizontal guide on the course and slide it along the wall, scraping mortar into the channel as you proceed. Do not get ahead of yourself or the mortar will set up too quickly. Pace yourself and give yourself enough time to comfortably install the bricks into the bed of mortar.
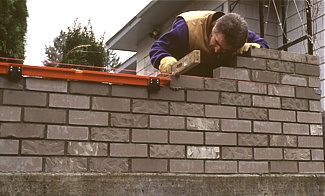 Place two or three bricks at each end of the wall and stretch the mason's level line from one end of the brick to the other, but not so tight that you pull bricks out of alignment. Use levels to ensure proper positioning, both horizontally and vertically. Press the bricks into the mortar bed to secure a firm bond. Level every corner brick to ensure vertical alignment. Place two or three bricks at each end of the wall and stretch the mason's level line from one end of the brick to the other, but not so tight that you pull bricks out of alignment. Use levels to ensure proper positioning, both horizontally and vertically. Press the bricks into the mortar bed to secure a firm bond. Level every corner brick to ensure vertical alignment.
The lugs underneath the horizontal guide (see photo at right) ride against the sides of the bricks to ensure a uniform mortar bed and help to properly position the mortar. They also touch against each corner brick to ensure a uniform mortar bed at the corner. The back lugs ensure the guide stays in position as you proceed around the corner.
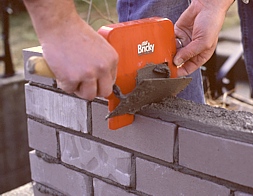
Use the vertical guide (see photo at left) to place mortar in the vertical joints, and do the last joint by hand or with a mason's grout bag. Use a dab of mortar on the end of the trowel to plaster in the vertical joint. Again, press bricks into the horizontal and vertical mortar beds to secure a firm bond.
Finally, use the Pro-Pointer to point all the mortar joints for a uniform finish.
These photos show the basics of using the Bricky wall-building system—the rest is up to you. This tool will help move your project along three times faster because it's easier, cleaner, and delivers precise mortar joints. It will take some practice, but it won't be long before you are ready to tackle a larger project, such as a brick sunroom.
This is one tool I highly recommend, and I'm confident that you'll enjoy using it as much as I did. If you want a great-looking brick project that can be done quickly, then Bricky, the professional wall-building tool, is for you.
Copyright © 06/24/06 LAF/C.R.S., Inc. All rights reserved.
[ Back to Top ]
|